Thursday, November 21, 2013

Drumstick Kulambu

Ya, I know, I have been under the radar for a while now!! Laziness has kicked in, these past few weeks, and all I wanted to do, was, to cuddle up in a cozy blanket and sip on some hot tea or a warm bowl of soup. Last week, I made this south-indian dish with drumstick in a coconut-based curry. It used to be one of my grandpa's favorites. My mom used to make it exclusively for him, although the rest of us enjoyed it too. All these years, I never bothered to learn it from mom as I kept thinking that the dish was too time consuming but apparently not!! This past week happened to be my grandpa's b'day and when I made this dish for the first time, I couldn't help but think of him and only kept wondering as to how much he would have enjoyed it.

Drumstick (also known as Moringa) is a vegetable used in South Asia. Most commonly used parts of the Moringa are the immature seed pods (called drumsticks) and the leaves (most nutritious part). The leaves contain a great source of vitamin A, vitamin B, vitamin C, vitamin K and proteins. The immature seed pods are good source of dietary fiber and other essential nutrients. In South India, drumstick is used in preparing Sambar (made with vegetables, lentils, spices and tamarind pulp) and the leaves are sautéed with onions, garlic and red chillies with grated coconut (optional) similar to cooking with spinach.

In the U.S, I am told that drumsticks are available at certain asian supermarkets.I buy the frozen version as it is already cut into pieces and cooks way faster than the raw drumsticks. Kulambu is the south indian term for any kind of curry-based dish. So, here's a fairly simple, tasty and flavorful dish to add to your meal varieties!!

Ingredients:

For the spice blend:

5-6 dry red chillies
2 tsp coriander seeds
1/2 tsp cumin seeds
2 tsp channa dhal
1/2 - 3/4 cup grated coconut, fresh or frozen (adjust to taste, I used 3/4 cup)
Few curry leaves
1 - 2 tsp oil

For the kulambu (curry):

1 big onion, finely chopped
2 medium tomatoes, finely chopped
1/4 tsp turmeric powder
1 1/2 cup cut drumsticks, fresh or frozen (about 1 1/2" pieces)
1 - 1 1/2 tsp tamarind paste (adjust to taste)
Ground spice blend
Salt, to taste

For tempering:
1-2 tsp oil
1 tsp mustard seeds
Few curry leaves

Method:

In a pan, heat oil, add channa dhal and fry for 1-2 mins. Add dry red chillies, coriander seeds, cumin seeds and grated coconut. Fry for 3-4 mins and add curry leaves. Roast well and cool. Grind to a fine paste with little water. Set aside.


In a pan, add onion, tomatoes, turmeric, salt and water (approx. 1 1/2 - 2 cups). Allow it to boil on medium heat for 5-6 mins. After it starts to boil, add the cut drumsticks (usually I cook it in the microwave with water for 1 min) and boil for few mins. 


Add tamarind paste and mix well. Boil for another 3-4 mins. Add the ground paste and simmer for 5-6 mins until the raw smell is gone. 


In a small pan, add mustard seeds and curry leaves. After the mustard seeds starts crackling, pour it on the curry, mix well and cook for 1-2 mins. Serve hot with rice.


For a variation, use jackfruit seeds (needs to be boiled or pressure cooked) or indian eggplants instead of drumsticks.


Makes 5-6 servings.

Wednesday, October 30, 2013

Choco Bread Burfi

Its funny how you come across something unexpected when you are actually looking at stuff that is not even remotely related to what you just discovered. Well, this is one such recipe!! Diwali, this year, is on Nov 3rd, and is, just a few days away. I try and make couple different sweets every year apart from the usuals. Of course, I choose to make stuff that is not very time consuming but tastes delicious. When I first saw this video on tube (FYI, original video is in Hindi but towards the end, there is a quick recap partly in English), I couldn't wait to give it a try. It looked simple yet tempting enough to be on my to-try-out list. With slight changes, I was surprised that it turned out so good that my daughter couldn't stop with a small bite. 

The original recipe is almost vegan except for the usage of regular milk which can be easily switched to any non-dairy milk of your choice. Most of the indian sweets normally involve liberal use of ghee (clarified butter) but I was really happy to see a recipe that did not use any....now that's a first!!!  The best part is that the ingredients are readily available in everyone's pantry, so what are you waiting for?? Trust me, you gotta try it out. It's definitely one of a kind and pretty darn good too!!

Adapted from Tea Time with Rakesh Sethi

Ingredients:

2 1/4 cups breadcrumbs (approx. 4 slices - I used 12 grain bread)
1 cup unsweetened almond milk, original (3/4 cup would work as well)
2/3 cup ground raw sugar
2/3 cup frozen shredded coconut, thawed 
2  tbsp chopped cashewnuts
1 - 1 1/2 tbsp blanched almonds, chopped
1 tbsp unsweetened cocoa powder (optional)
2 - 3 drops kewra essence (or rose essence or 1/4 tsp cardamom powder)
2 tsp oil + extra for greasing pan
Cashews or Almonds or Pistachios, for garnish

Method:


Cut the brown ends from the bread slices. Prepare the bread crumbs using a food processor or blender (pulse until crumbs are formed) with your choice of bread, preferably, white/wheat or any grain-based bread (plain, no flavoring).


In a large mixing bowl, add the bread crumbs, unsweetened almond milk and cocoa powder. Mix well and set aside until it softens.


In a pan, on medium-low heat, add the ground raw sugar and fresh or frozen grated coconut and cook until the sugar completely melts. 


As the mixture starts to thicken (takes about 8-10 mins or so), add the chopped cashews and almonds and mix well. Cook on medium low heat until the mixture starts to bind well.


Add the soaked bread to the coconut-nuts mixture and stir well. Add flavoring of choice (I used kewra essence - extract made from pandanus flowers). Cook on low heat until the moisture is totally absorbed. Add oil (or vegan butter) to the mixture and cook for 5 mins or so. The bread mixture starts forming a big lump without sticking to the sides. Remove from heat.


Line a non-stick or glass baking dish with parchment or wax paper. Grease with cooking spray or vegan butter. Spread the bread mixture on the pan and smoothen the top for an even layer.

Allow the mixture to reach room temperature and cool it in the refrigerator for 1-2 hours (or freeze it for 1 hr). Cut into square or diamond shaped pieces. Garnish with nuts of choice (cashew halves/almonds or pistachios). Enjoy!!


Makes 16 pieces.

Monday, October 21, 2013

Til Ladoo

Life seems so pre-occupied with things adding up in my daily to-do list, sometimes, I wish a day was longer than 24 hours!! It has been a little over 2 months since my daughter started attending her new day care but she has fallen sick so many times. I suppose if you have a kid who attends day care/school, you can always expect a surprising home delivery of some sort of sickness that is so not welcome. Obviously, it starts off by sucking the energy out of the kid, with total loss of appetite (poor baby was literally on pedialyte/gatorade for nearly 3+ days) and an uncontrollable cough. The sickness cycle doesn't seem to be complete unless it has been passed on to atleast one person in the household, in most cases, a mom's gotta go through it all!!

It has been over a week since I made these Til (Sesame) ladoos but haven't had a chance to post it. Sesame has one of the highest oil content among seeds. Sesame seeds add a nutty flavor and is known to have a long shelf life due to the high levels of natural antioxidants. Sesame seeds is rich in vitamin-B and minerals like calcium, iron, zinc, magnesium, and copper. Sesame seeds, when consumed, helps reduce "bad" cholesterol and increases "good" cholesterol. It helps prevent diabetes, lowers blood pressure and also strengthens your immune system with the antioxidants present in them. Need I say more???

This is by far one of the easiest sweets that can be made in less than 10 minutes. All you need is 3 ingredients to enjoy these ladoos. This is one of the sweets that I normally make during Ganesh Chaturthi celebrations but it can be enjoyed all year round.

Ingredients:

1/2 cup white sesame seeds, dry roasted
1/3 cup raw peanuts, dry roasted & de-skinned
1/3 - 1/2 cup powdered jaggery (unrefined whole cane sugar), adjust to taste

Method:


In a pan, dry roast the sesame seeds and peanuts separately.


If using raw peanuts with skin, after roasting, remove the skin from the peanuts and keep aside.

Using a blender or food processor, make a powder of the sesame seeds and peanuts separately.


In a large bowl, mix the powdered sesame seeds and the powdered peanuts.


In a blender or food processor, to few ladles of the mix, add jaggery and pulse (do it in batches).


Make ladoos from the above mix. The natural oils from the sesame seeds and peanuts along with the moisture from the jaggery help form the ladoos easily.


Store in an airtight container and enjoy until it lasts!! 


Makes 10 ladoos.

Wednesday, October 9, 2013

Vegan Magic Bars

October officially marks the start of the holiday season with celebrations lined up one after the other....Diwali, Halloween, Thanksgiving and Christmas. Its not just that, it's the best part of the year because it gives you more reasons to enjoy sweet treats (who needs one anyway, right??). Holiday season always reminds me of time spent with family. Every year during Thanksgiving or Christmas, we get together with my aunt's family and she bakes a bunch of goodies, one of which, is the magic bars!!

Not sure, how it got its name but it is a piece of sweet goodness. When you taste a magic bar, you wonder if you are eating some sort of chocolate with nuts and coconut?? But wait.....no, it tastes more like a decadent cookie with a nice graham cracker crust. It does get your taste buds thinking but can totally satisfy your sweet cravings with a bit of everything in it. Originally, loaded with a whole lot of calories and sugar, this is a bit toned down but can be prepared much lighter too. As I was making these bars, I couldn't stop thinking about how a pumpkin pie bar (topped with coconut and pecans) would taste with some ginger snap cookie crust...perfect treat for the fall season. Gotta get me some pumpkin pureé!! These bars store well for a week (i.e., if they last that long). Two batches of these bars and four days in the drafts, its about time this recipe hits the post!!!

Ingredients:

For coconut caramel sauce:

3/4 cup light coconut milk
1/3 cup raw sugar

For the bar:

8 - 9 vegan graham cracker crust (approx. 1 1/2 cups crumbs)
3 tbsp vegan butter, like earth balance, melted
1 1/2 tsp raw sugar (optional)
1/2 cup vegan semi-sweet chocolate chips
1/2 cup chopped walnuts
1/4 cup unsweetened coconut flakes
2 tbsp dried cranberries, finely chopped (optional)


Method:


For the crust, use graham crackers or any vegan cookies (my personal favorite is the vegan digestive biscuit crumbs) and pulse in a food processor or crush it with a rolling pin or your fingers.

Preheat oven to 350° FIn a 9 x 9-inch baking pan, brush or spray little cooking oil (optional) and line with a parchment paper.

In a mixing bowl, add the graham cracker or cookie crumbs, melted butter (or organic coconut oil, melted) and sugar, if using (I didn't use any). Stir the mixture until moist. Layer the mixture in the bottom of the baking pan and press until even.


In a saucepan over medium heat, add the sugar and coconut milk and stir until sugar is melted. Reduce to low heat and cook until the mixture turns from light to medium-dark amber color (takes about 10-12 mins). For a variation, you can prepare a butterscotch sauce by melting 1/3 cup sugar with 1 1/2 tbsp water. After the sugar is melted and the caramel thickens, remove from heat and stir in the butter. Flavorful and irresistible butterscotch sauce is ready!!


Pour the coconut caramel sauce (or butterscotch sauce) evenly over the graham cracker crust. 

Sprinkle with chocolate chips and walnuts evenly over the caramel sauce. 


Sprinkle the unsweetened coconut flakes and cranberries. Press the top mixture slightly with a rubber spatula.


If using butterscotch sauce, pour 1/4 cup of vegan condensed milk (1/2 cup vegan evaporated milk and 1/4 cup sugar simmered over medium heat until sugar is melted) or whisk 1/4 cup coconut milk  and cornstarch paste(mix 1 1/2 tsp cornstarch with 1 tsp coconut milk/water to a paste) and pour evenly over the toppings and bake for 25-30 mins until the edges are browned. 


Cool completely before cutting into squares. Slowly lift the entire piece using the parchment paper on the sides and cut into squares. For perfect squares, refrigerate for 2-3 hours (the hardest part is keeping your hands off of these) before cutting. Keep at room temperature for 10-15 mins and then cut into squares. Enjoy!!


Makes 16 bars.

Monday, September 30, 2013

Vegan Mofo Round Up

It is officially the last day of Vegan Mofo. It has been an interesting month making different soups although I would have definitely loved to add more recipes but unfortunately family duties took over and time got in the way.

Anyway, here's a round up of the soups posted: 

Minestrone Soup: Classic hearty italian soup with chunks of fresh veggies and pasta in a flavorful tomato and vegetable broth.


African Peanut Soup: Rich and creamy soup with the goodness of peanut butter and a bit of heat from cayenne pepper.


Tortilla Soup: Get a taste of Mexico in a bowl with this classic and flavorful tortilla soup.


Mulligatawny Soup: Spicy indian soup made with lentils and thickened with rice.


Gazpacho: Refreshingly cold spanish soup that is perfect for the summer season (although its officially Fall, you can still enjoy this soup on a nice sunny day).


Cuban Black Bean Soup: Hearty soup filled with earthy flavors. Pair it with a cuban salad or sandwich to complete a meal.


Ukrainian Borscht: Vegetable soup made primarily with beets. Can be served hot or cold.


Tom Yum SoupHot and Sour Thai soup with aromatic herbs like lemongrass, galangal, kaffir lime leaves, lime juice and thai chilli peppers. 


Cream of Carrot Soup: Healthy and delicious bowl of creamy carrot soup without any cream. 


Vegetable Miso Soup: Light and flavorful japanese miso soup, perfect as an appetizer.


All said and done, it felt good participating in Mofo  and I enjoyed following other Mofo-ers this month...lot of inspiring recipes, some totally indulgent and drool worthy too.  Hopefully, the next time around, I will have more interesting recipes to share. So, until then, happy blogging y'all!!

Vegetable Miso Soup

Miso is fermented beans, mostly soybeans. My Mofo Post 10Miso soup is a traditional Japanese soup made using 'dashi' stock. Dashi is a japanese soup base that is prepared by soaking kombu (kelp), niboshu (dried sardines), katsuobushi (dried bonita - fish flakes) or shiitake(dried shiitake mushrooms). The vegetarian version uses kombu and/or shiitake mushrooms.

Miso paste comes in several variations such as white (shiro miso), red (aka miso) and mixed (awase). Miso paste is chosen based on the ingredient it is normally cooked with, and the taste varies from mellow to intense. The miso paste when added to the soup has a good amount of saltiness (which I am not generally used to). So, a low-sodium miso paste might be better, especially, if you are conscious about your salt intake.

Talking about salt, all I can think about, is my daughter. For everyday cooking, we consume less salt when compared to others (don't worry, I don't cook that way when I have friends/family over). But my daughter, on the other hand, has a picky palate!! She refuses to eat any food with less salt in it. I can already sense that she is going to be my biggest critic as she grows up.

Miso soup served with white rice is a traditional japanese breakfast. Despite, its reputation for high sodium content, studies show that miso-based diets can lower the risk of cardiovascular problems. Also, consuming more than 2 cups of miso soup, can reduce the risk of breast cancer in women. It is a good source of vitamin K, minerals, protein and dietary fiber. It contains antioxidants that increase with fermentation period. Did you know that 2 tablespoons of soy-based miso is equivalent to a quarter cup of legume?

It is one of the easiest soups to make. If you have miso paste, you are almost half way there. Add veggies of your choice and enjoy this easy and light miso soup.

Ingredients:

1/4 cup button (or shiitake) mushrooms, thinly sliced (approx. 3-4 medium sized mushrooms)
1/4 cup nappa cabbage, roughly chopped
2 - 3 tbsp scallions, finely chopped (green and white part)
1/4 cup soft/silken tofu (8-10  1" cubes)
3 cups filtered water
2 tbsp white miso (shinshu) paste 
1-2 tbsp wakame or dried seaweed, shredded (optional)
Dash of low-sodium soy sauce (optional)
1/8 tsp hot sesame oil (optional)

Method:


Choice of vegetables is based on your preference. It is suggested to keep vegetables at a minimal instead of having them dominate the soup. Grated carrot is also a good addition to the soup.


In a stock pot, on medium heat, add water, nappa  cabbage, sliced mushrooms and white part of the scallions (almost like a quick veggie broth). Simmer for 4-5 mins until mushrooms and nappa cabbage shrink slightly.


Note: If adding dried seaweed, add it to the water and let it simmer for 5-6 mins until all the fishy smell is gone and then add the rest of the ingredients.

Add tofu and boil for 2-3 mins. 


In a small bowl, add the miso paste and ladle 1/4 cup of the simmering vegetable broth. Stir well using a fork or whisk to soften the miso paste.


Add the softened miso paste into the broth and mix well. Simmer for 2-3 mins until miso is dissolved (Do not boil the miso as it will lose all its healthy enzymes). 


Add soy sauce, hot sesame oil and green part of the scallions. Simmer for 1-2 min and turn off stove.


Ladle into bowls and garnish with scallions (green part only). Serve hot with rice(optional).


Makes 3 servings. 

Saturday, September 28, 2013

Cream of Carrot Soup

Its been a couple days since I posted anything on the blog. Things don't always happen as planned, especially, if there is a kid in the equation. My poor baby has been going through a bad case of the stomach bug. Apparently, it is a common illness if a kid attends daycare. I can't believe its so easy to catch on such stuff....it's her 2nd round in the past month and a half. It has her completely drained out. Doctors have nothing to say except to be prepared for some sort of sickness (mostly cold and stomach bug/flu) every month. Really??? Its hard enough to see your kid go through any kind of illness and to add to it, having to go through it every month!!! God save me and the little one!! Unfortunately. there isn't any way out of this, hopefully, she'll grow out of it soon.

Anyway, coming back to my Mofo posts, it is a bit disappointing that I will not be able to complete my Mofo with 20 posts but I'll try and post as many as I can, for the remainder of this month.

Carrot has been a staple ingredient in our house, especially for my daughter. Every time, I make some sort of indian dal or khichdi (toor or masoor dhal, rice and veggies with spices) for her, it usually has carrot along with some other veggies.  In India, 'Gaajar Ka Halwa', a popular sweet dish, is made using grated carrots, milk, sugar, nuts and clarified butter. Who doesn't like a carrot??? Its crunchy, sweet and healthy too.

Carrots have a natural sweetness which makes it a great snack for everyone. It is rich in antioxidants, vitamins and fiber. This low-calorie vegetable is loaded with beta-carotene which converts to vitamin A when consumed (FYI, deeper the orange color of the carrot, more the beta-carotene). Most commonly available carrot is of orange color, but there are other varieties and colors too. Did you know that recent studies at Harvard University suggests that people who eat more than 5 carrots per week are less likely to suffer a stroke when compared to those that ate just 1 carrot a month?? Need I say more?

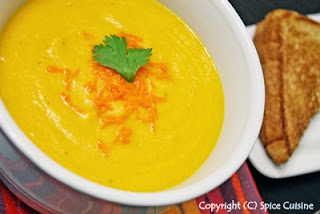
So, here's my Mofo Post 9, Cream of Carrot Soup. The best part is that its creamy without any cream in it. Wondering how??? The secret is OATS!! Long time ago, I read an article online that mentioned about substitutes for healthier options which had oats for cream based soups. Now, what better time to try it out than Mofo? Easy, healthy and delicious bowl of creamy carrot soup.  Enjoy!!

Ingredients:

1 medium onion, finely chopped
3 cloves garlic, minced
3/4 - 1 tbsp fresh ginger, finely grater or minced + 2 tsp ginger juice 
1 lb carrots, peeled and diced (approx. 2 3/4 cup)
1 1/2 tbsp extra virgin olive oil
1/4 - 1/2 tsp crushed red pepper (optional), adjust to taste
2 1/2 tbsp rolled oats
3  cups water (or vegetable broth)
Salt and Pepper, to taste

Method:


In a stock pot or dutch oven, heat oil over medium heat. Add onions, garlic and crushed red pepper (if using). Sauté until the onions are soft, for 4-5 mins.


Add carrots and grated ginger and cook for 5 mins. 


Add water (or broth), salt, pepper and rolled oats to the pot and stir well. 


Bring to a boil, reduce to medium-low and simmer for 20-25 mins until the carrots are tender. The soup will slightly thicken.


Note: You can use a pressure cooker to prepare the soup. On medium heat, cook for 3-4 whistles until carrots and other ingredients are tender. This process is much faster when compared to cooking in a stock pot/dutch oven.

In a food processor or blender, pour the soup and blend until creamy. If it is too thick,  add water or broth, for desired consistency.

Simmer the creamy soup for 4-5 mins and add ginger juice (grind the ginger with little water), if using. Check seasoning and adjust to taste. If desired, you can add 1/2-1 tsp lemon juice. 


Garnish with a dollop of non dairy yogurt or sour cream and a sprinkle of freshly chopped dill or parsley. Serve hot with a simple grilled cheese toast.

Makes 3-4 servings.